


As a new or even experienced Leica M user, you’ve probably been frustrated by finding the camera is difficult to focus quickly and setting exposure difficult as well. I’ve had a Leica M for about 5 years, and when I first got into Leica I was frustrated with them too, even to the extent that I almost gave up shooting with them and wanted to go a different direction. But then I discovered a few methods that have helped me focus a lot faster, get my exposure setup correctly faster and just start to figure out what my photograph will look like. This has meant that having the camera setup right for the photograph I want to create becomes second nature to me, and I don’t even have to think too much about it. I just get the picture I want. The hard part is, and always will be, deciding on what I want for the photograph.
Great Comment from a YouTube user on the video
I’m on a M240. I always set the shutter on ‘A’ (automatic) , f.11, infinity and ISO 2000. And never the lens cap attached. So I’m able to pull out the camera and shoot. I call it my ready to shoot settings. If I continue shooting, the settings are adjusted depending on the job, but in general my ready to shoot settings are working out very well…
Paul Sehstedt
This is not an article on how to take better photographs. This is more about how to get better and faster with setting up your Leica M and using it. It is about not letting the technical aspects get in the way of you taking the photograph you want to create.
How to focus a Leica M lens ultra fast
Whenever you are not taking photographs, even for a minute, set your lens to infinity. That way you know that when you lift your camera to the eye if your scene’s focus point is at infinity you are in focus and there is nothing else to think about with focusing your camera. But it also means that if your focus point is closer to your camera, you only need to move the focusing tab one way.
Remember how we focus a Leica M
When you look through the viewfinder of a Leica M, everything is in focus. All you have to do is line the focusing patch up with your focus point, and adjust the focus so that the ghost image overlays, or lines up, properly with the photograph you are taking.
If you have your focus tab preset to infinity, you only need to move it one way. You don’t need to hunt around, which is something I see a lot of newbie and veteran Leica M photographers doing. This tends to slow them down, forget about the moment they are trying to take a photograph of, and more often than not, miss out on the shot they wanted. You can focus a lot faster when you only need to move the focus patch one way, because lets face it, it can get disorientating in the M’s viewfinder.
Learn how to Zone Focus
Zone focussing has been the single most beneficial thing for me to learn as a Leica M user. It is very simple, and makes me much faster in using the camera. If you set your lens to a certain distance, eg 5m, look at the zone focussing scale on the lens. At the wide open part of the lens, the brightest aperture, it is only items of that distance that will be in focus. Stopping the lens down will mean more closer and further away from you will be in focus, and it is easy to get the hang of it when you have used it for a bit. Eventually with practise you’ll be able to head out, set a distance on the lens and then an aperture to specify how much closer and further away from that point will be in focus. You’ll be able to look at a scene and know straight away what will and won’t be in focus in the shot in front of you. Think about it: Imagine you are taking photos of people at cafe tables on the sidewalk. A table is roughly 1.2m wide. Specify a distance to the middle of the table from where you are standing, and stop the lens down a bit to make sure those sitting closer to you and further away from you are in focus.
I think with the advent of being able to select focus points on a touch screen or with a joystick and EVF, or even with depth of field preview in an SLR camera, the skill of zone focussing and the importance of it has been forgotten. It needs to come back. It saves time when you are out taking photos.
Set your Leica M’s exposure quickly
Setting the exposure time, shutter speed, on your Leica M can be fiddly and slow. But you can make it a much faster process by leaving it always on 1/4000 when in storage or in your bag and then when you are taking a shot, turning it just 1 way. No hunting around. I find the light meter in the Leica Ms confusing. I never truly know which way to turn my shutter speed dial. So I always set my shutter speed to one extreme, and then turn it back the other way to get it right, and get the correct exposure circle icon appear at the base of my viewfinder.
Use the Sunny 16 Rule
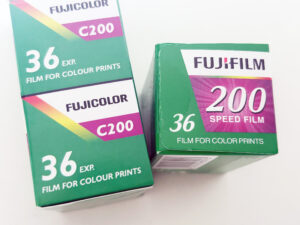
You get a real vintage look with your exposure this way. Try the Sunny 16 rule. That means, Shutter Speed = ISO when your Aperture = F16 and you are out on a bright sunny day. If you want to open the lens up by a stop, adjust the shutter speed by a stop. Likewise, if it is cloudy or you head inside, leave your shutter speed and ISO alone, and adjust the aperture like this diagram. It it not perfect, but there was once a time when this diagram appeared on film boxes as a guide. You get a generally correct, but slightly retro, not perfect exposure sometimes that just looks good. It is different to being perfectly correct.

So there you have it! My technical tips on how to get more from your Leica M.

One Response
fairly in depth. but you lack understanding of the true meaning of leica